
Thursday, October 29, 2009
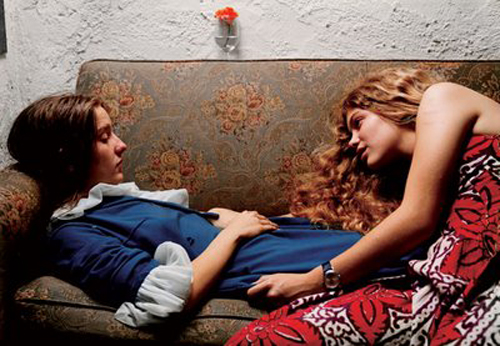
Jacob Holdt's documentation of the American South
In 1970 the Danish traveler discovered the injustices and the beauty of the rural south. He documented his adventures with a Canon Dial. View his story here.
Friday, October 23, 2009


Saturday, November 22, 2008
Southern Sculptor Walton Creel
Today I read an article in Art Papers on Walton Creel, an artist working in Birmingham, Alabama. His large images of wildlife are created by shooting .22 caliber bullets at close range through a sheet of white painted aluminum. The images themselves are simplistic. However, upon close inspection the small bullet holes and welts of the buckling aluminum become obvious. The animal images in the Deweaponizing the Gun series (especially in Bunny and Oppossum) have dynamic perspective and resemble two-tone graphic art. The "pixelation" or the schematic plotting of the bullet holes is almost reminiscent of cross-stitching. And the raised ridges around the bullet holes are extremely sensual calling us to stroke the braille-like surface. However, the highly evocative sculpture is anything but kitsch. Creel seems to be posing questions concerning media and process rather than making Southern yard art. The connection between bullet holes and game animals is obvious but Creel seems to be preoccupied with the inherit juxtaposition of the appearance of the final product as a work of fine art with the unconventional technique that was used to create it. As someone fascinated with processes and experimentation Creel's work is a reminder that the medium can inform the content but the artist has the ability to manipulate the formal qualities and create an entirely new context for that medium.

Walton Creel
Deer
2003
.22 caliber bullets through white painted aluminum
6 x 4 feet
Friday, July 4, 2008
Blind Contour Drawings in the Dark
A few nights ago my friend and I went to the park to tell ghost stories. We shared some paranormal experiences and then decided to do some drawing. Using the faint moonlight that was filtering through the clouds we studied each other's features (lines, shapes, textures) and drew without looking at the drawing surface or lifting our pencils. We spent about the same amount of time on each drawing--averaging around 4 minutes. I found it a bit difficult to see the details that comprised his face but recorded as much information as I was capable of.


The results were varied. He found that at some point he began to use more of the drawing surface area rather than confining his marks to a localized portion of the paper. He had also experimented with looking away while drawing me. While I primarily focused on his head, neck, and shoulders, he tended to create full-body compositions. His images often overlapped and appear to be representing several viewpoints at once--a quality reminiscent of Matisse or Picasso.
My Drawings of My Friend
My Friend's Drawings of Me
Sunday, June 29, 2008


Wednesday, May 21, 2008
Experiment based on the art of Tim Knowles
I recently read a brief article on the artist Tim Knowles who in 2005 created a series of "Tree Drawings" by attaching ink pens to the tips of tree branches and placing an easel within reach. The branches moving in the breezes created interesting lines with a wide range of variety in thickness and direction. During periods of stagnant air the branch and pen were at rest and ink bled in small dots. The images the experiment produced resemble constellation maps.


Yesterday was quite windy and an appropriate day to conduct my own experiment based on Knowles' concept however, there is one factor that creates a powerful variable which was not as crucial in Knowles' experiment--gravity. Approximately 10' above the ground I attached three drawing pens to three different tree branches on the same tree using thread. I let the thread spool and the pens descended until the tips were grazing the surface of a piece of white drawing paper on the ground below. As the wind blew the pens dragged along in a drunken dance. Occassionally, a pen would dash outside of the perimeters of the paper and onto the dirt. I observed for a few minutes and then let nature create uninhibited for an hour. The results were not as profound as I had hoped for. One problem in the experiment was that the pens were all stuck in the dirt when I returned to collect the finished artwork. A larger piece of drawing paper should have been used to give the tree more freedom in its range of mark-making motion. Also, the ink pens I used were old and nearly dried out. The thread seemed to be an appropriate choice. It's extendible qualities allow for adjustments after the branches have been tied.
Sunday, May 18, 2008
Creating a Two-Part Plaster Mold

1. Using petroleum jelly, grease a free-release container appropriate for the size of the object for which you will be making a mold.

2. Grease the object for which you are making a mold (celery root).
3. Make reinforcement fibers by cutting strands of thick hemp rope and unraveling them.


4. Fill a bucket or other medium sized container with water. Gradually add plaster by sprinkling it over the surface of the water--mixing by hand until the plaster sprinkles begin to sit on the surface of the mixture.

5. Quickly begin scooping plaster into greased container until plaster coats bottom at least 1" deep. Add some shredded hemp fibers and more plaster until a substantial thickness is reached in proportion to the weight of your mold object. Place object in plaster and begin filling the container with plaster and hemp around the object until it reaches halfway up the object.
6. Prepare another batch of plaster if necessary to reach halfway up the object. Smooth out the surface but add a nodule on either side of the object. This will create a groove for the two-part mold to lock in place. Let mold set at least 1 hour.
7. Clean up any debris of plaster and smooth out edges and nodules. Be sure no hemp is exposed or your "two-part" mold will not separate. Grease top of object, plaster, and container well keeping in mind that any deep recesses or protruding fragile appendages may be lost or cause the mold to fail.
8. After at least one hour prepare more hemp strands and make a hemp rope handle by tying off two ends of a piece of hemp rope with enough room in between the knots for a handle. Fray the ends of the rope (beyond the knots) so that the frays can be embedded in the wet plaster.
9. Prepare plaster mixture and coat top of object layering plaster and hemp threads until you reach the top of the container or there is at least 3" of plaster covering the top of the object. Quickly place the handle on top and cover frayed ends with plaster. Let sit at least one hour. Since the activation and setting of plaster is a chemical reaction you can tell if the correct proportions of water to plaster were used if the mixture begins to heat up. If after 30-45 minutes the plaster is still damp to the touch the proportions were not exactly correct and the plaster will remain chalky and the product will be much more fragile.
Subscribe to:
Posts (Atom)